When and How Should You Trim Pottery?
· Updated · 4 min read
Trimming turns a heavy, flat-bottomed pot into a light one with a foot ring. It’s also where beginners lose pots. Mostly it’s timing, plus a sharp tool.
Why trim at all?
Most pots come off the wheel with extra clay at the base. Trimming takes that weight off, refines the outside profile and carves a foot ring, the raised ring a pot stands on. A foot also gives you a clean edge to wipe glaze from.
When is it ready?
Leather hard. Too wet and the clay smears, sticks to the tool and the rim distorts when you flip the pot. Too dry and the tool chatters and skips and throws off powder instead of ribbons. Right is when a fingernail leaves a mark but the pot holds its shape, and the trimmings curl off like apple peel.
That’s anywhere from a few hours to a day or two after throwing, depending on your clay, the weather and the size of the pot. To slow things down, cover pots loosely with plastic. Rims dry first, so wrap them in a strip of plastic cling wrap and the rim and base get there together.
How thick should the base be?
If you plan to trim, leave about 1/2 in of clay in the base when you throw. Trimming then brings the floor and foot down to roughly the thickness of the walls. Check while the pot is still soft by pushing a needle tool straight down through the floor, pinching it where it meets the clay and measuring.
Tools
Loop and ribbon tools do most of the work. Big, wide loops take clay off the outside quickly, and small sharp ones refine the inside of the foot and tight curves. Square and triangular loops cut crisp corners and steps. A 3 piece wood-handle loop trimming set covers the common shapes, and a large foot ring trimming tool speeds up bigger pots. Browse loop and ribbon tools.
A needle tool marks where the foot goes and checks base thickness, and small carving tools clean up inside the ring (detail and needle tools). To hold the pot centered, you can tap it true by eye and press down small clay lugs, or use trimming spinners (wheel accessories). Foot ring templates keep feet consistent across a set of bowls or mugs. More in trimming and carving tools.
Trimming tools we recommend
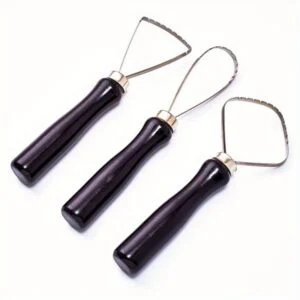
Use it for: Shaving clay quickly from bases and walls
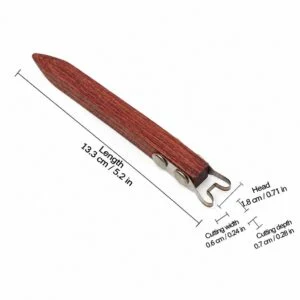
Use it for: Carving foot rings on bigger bowls and vases
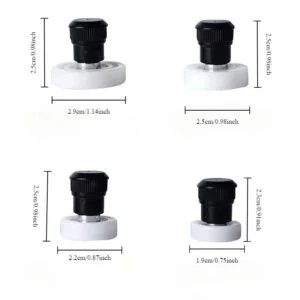
Use it for: Holding a pot centered without clay lugs
Skip it if: you're fine sticking pots down with a few lugs of soft clay, which costs nothing
Step by step
- Check the base thickness. Press a needle tool through the inside floor before the pot dries, or tap the base once it’s upside down. A dull thud means thick clay, and a hollow knock means it’s getting thin.
- Center the pot upside down, rim on the wheel head or a damp bat. Spin slowly and tap it toward center until the rim runs true.
- Secure it with three small coils of soft clay pressed against the rim and the wheel head, or use trimming spinners.
- With the wheel turning, touch a needle tool lightly to the base to mark the outer and inner edges of the foot ring.
- Trim the outside first. Hold the loop tool firmly, brace your hands together and take clay off the outer wall below the foot line, following the curve of the inside.
- Carve the foot: remove clay inside the marked ring to the depth you want, leaving a wall that matches the rest of the pot.
- Burnish the trimmed surface with a soft rubber rib or the back of a tool, and round the foot edge slightly so it doesn’t chip.
When it goes wrong
- Chattering (ripple marks): the clay is too dry or the tool is dull. Mist the surface, slow the wheel and take lighter passes.
- You cut through the base: check thickness first and tap as you go. The sound changes as the clay thins.
- The pot flies off: re-center it and secure it before you start.
- Cracks at the foot: compress the floor with a rib when you throw, and dry slowly.
- Rim marks from the wheel head: trim on a damp bat or a thin piece of foam, and make sure the rim isn’t too soft when you flip the pot.
Sharp tools
Loops dull. A sharp one cuts cleaner, needs less pressure and chatters less. Rinse and dry them after each session, and replace any that have bent out of shape. If you’re still building a kit, start with the tools beginners actually need.
Questions potters ask
How do I know when a pot is leather hard?
Press a fingernail into the base. It should leave a mark without the pot bending, and the clay should feel cool and firm, like a block of cheese. If you can flip it rim down without the rim distorting, and a loop tool curls off clean ribbons, it's ready.
Can I trim a pot that has dried too much?
If it's only a little too firm, mist it lightly, cover it in plastic for an hour or two and try again with a sharp tool. Don't trim bone-dry pots. They're fragile, the tool chatters, and the dust isn't good to breathe. Smooth those after bisque firing instead.
Does every pot need a foot ring?
No. Many mugs, plates and cylinders just get a clean, slightly beveled base. A foot ring does the most for bowls and rounded forms, where it lifts the curve off the table and gives you an edge to wipe glaze from.
What causes chatter marks when trimming?
The tool bouncing on clay that's too dry, or a dull tool. Mist the surface, slow the wheel, brace both hands and take lighter passes. Sharpening or replacing the loop usually fixes it.
How do I avoid trimming through the bottom of the pot?
Measure the floor with a needle tool before the pot firms up, then tap the base as you trim. A dull thud means plenty of clay. As it thins the sound turns hollow and higher. Stop and check often.
How do I trim a pot with a narrow neck, like a vase?
A narrow rim can't sit flat on the wheel, so set it in a chuck: a leather-hard clay cylinder or bisque form centered on the wheel that the pot rests in. It holds the pot on center while you trim the foot.